
Since early this year I've been working with the team at Screen Vistas to ensure that the audio for their national advertising is delivered to cinemas in the correct format and specifications.
Sometimes this simply involves checking that a provided 5.1 surround mix is error free and delivered at the correct loudness level (82dB Leq).
For other jobs audio is delivered as stems (eg Dialogue, Music and Effects) which I can then mix into 5.1 surround sound and export at correct loudness.
It's a real privilege working with the team at Screen Vistas, and fantastic to be regularly using my newly updated Genelec Smart Active 5.1 surround monitoring system.
'Waters of the Greenstone' at Banff Mountain Film Festival 2017
Great news came through recently that a documentary project I worked on this year for Resonate Productions, "Waters Of The Greenstone" has been selected for Banff Mountain Film Festival 2017! Screening in Banff, Alberta, Canada during the festival starting Oct 28th.
For NZ based friends who want to see the film, Kathmandu are hosting some screenings around the country in the next few weeks.
Monday 16th Oct Auckland
Tuesday 17th Oct Rotorua
Wednesday 18th Oct Wellington, Lower Hutt
Tuesday 24th Oct Christchurch, Tower Junction store
Thursday 26th Oct Invercargill
Friday 27th Oct Queenstown
Well done Simon and the team at Resonate - stoked for you and also stoked to have been a part of this film.
Best NZ Made Film | 2017 NZ Mountain Film Festival
The team at Resonate are really on a bit of a roll this year, with their film The Waiau-Toa Odyssey winning Best NZ Made Film at the 2017 NZ Mountain Film Festival. I contributed with the sound design and mix.
Here's the low down...
3 adventurers, a film-maker and a photographer set off on a 6 day, 300km unsupported journey. By combining new bike-packing and pack-rafting technology, they link together white-water rivers and backcountry tracks through some of NZ’s underappreciated wilderness areas. To add to the drama, only months before a massive earthquake changes their plans and reveals opportunities to explore new landscapes.
More about this Film : waiautoaodyssey.nz
And now that it has had it's run around festivals and screenings I can share the full film as well!
Enjoy!
Stu Stu Studio!
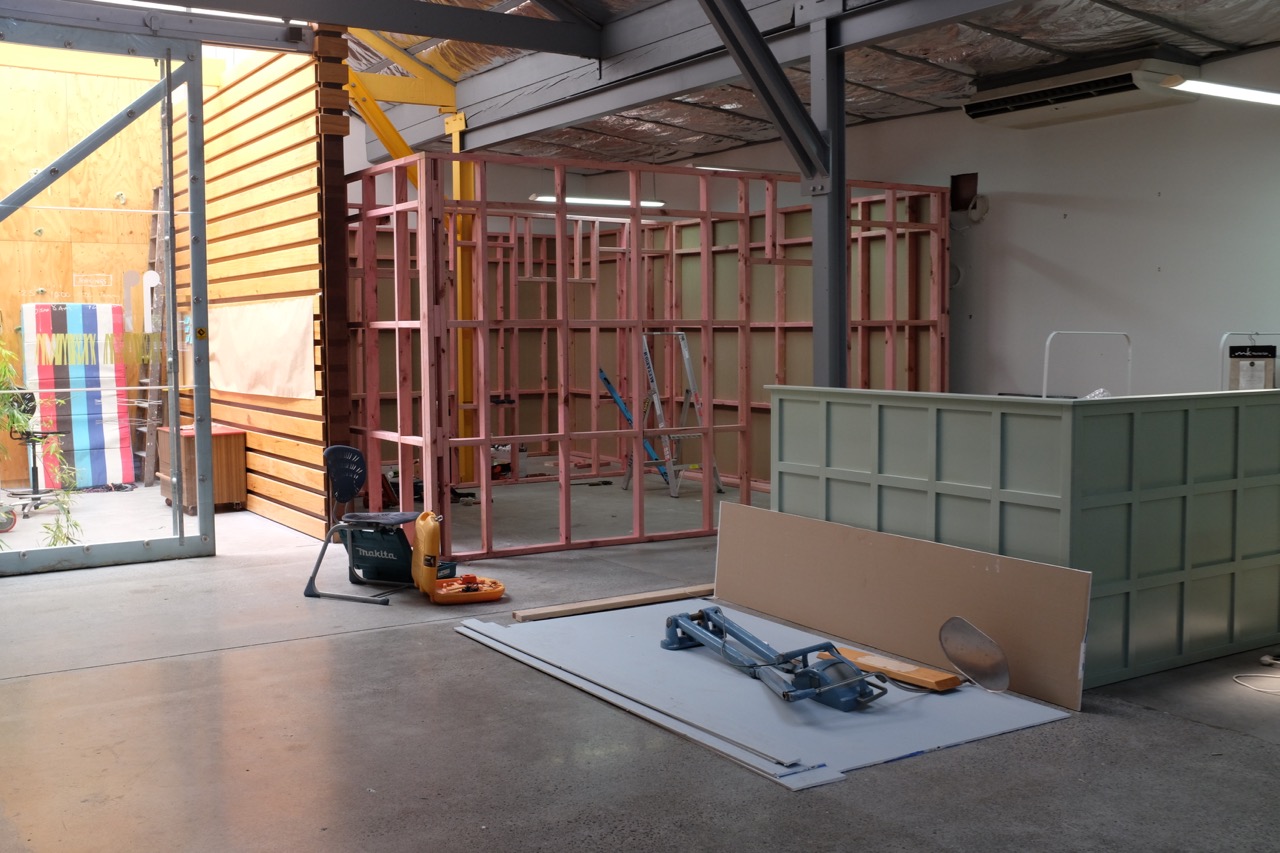
Time for a wee write up on the BIG project of the year - building the new studio!
Moving up to Napier from Christchurch last year presented a whole lot of new challenges, not least of all was where to set up my workspace.
Looking around town it was pretty hard to find an ideal spot. A studio needs to be a pretty specialised build, so even fitting out an existing space can get expensive, and often it's better to just start from scratch - so that's what I did. I was fortunate to be introduced to the folks at Band, which is a creative agency based in Ahuriri, Napier. They are based in their large re fitted warehouse facility, that also functions as a shared workspace for a number of and also lease space which also hosts a number of small to medium sized creative businesses. It's a really great space with a top bunch of people, and so, settling on a good location for my build inside this space, I got to planning!
I had to really engage my 3rd form Tech Drawing skills on this puppy...
Here are some shots of the build process - firstly some planning and visualising in the existing alcove space. Using this alcove area was key because it provided me with 3 existing walls to build within. This saves cost when you are building a double walled structure!


Next, the framing goes up and insulation goes in. You can see in the first picture the two rear walls are built in reverse, with two layers of gib on the back, leaving the framing and then insulation exposed internally. These are to be my slat resonator walls that give a combination of high and mid frequency range sound absorption.


Then Gib! 2 layers of 13mm Noiseline with Green Glue in between. The ceiling is also 2 layers of 13mm Noiseline but hung on Quiet Clips to increase sound proofing. (as seen in the last photo)


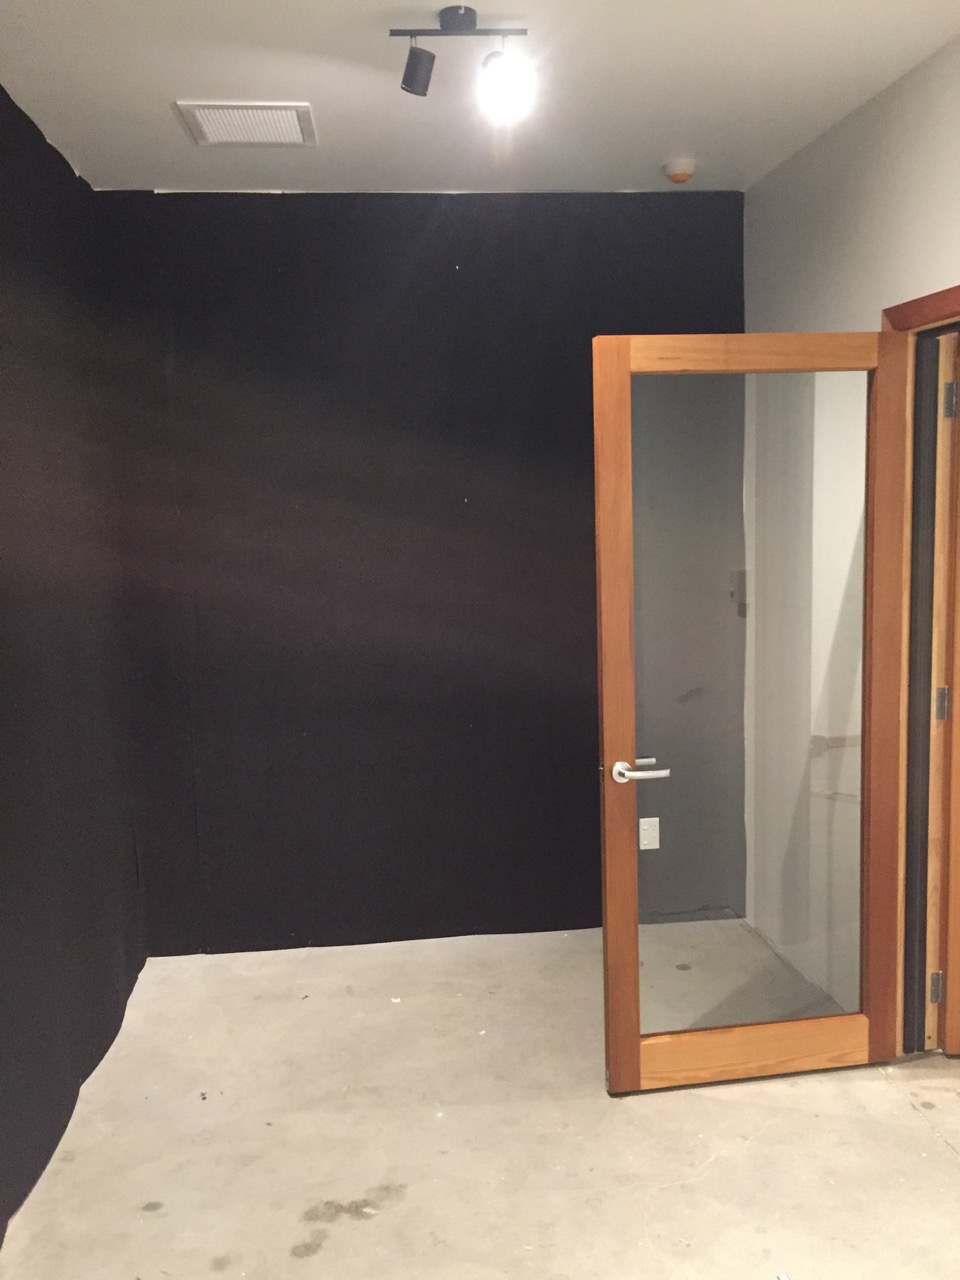
Slap a bit of paint round, windows and doors in. Studio window is 2 panes of glass, one 10mm thick and the other 6mm. Booth doors to the booth are glazed with 6mm safety glass, and the main external doors are solid core, super heavy - sourced from the old Dannevirke Hospital of all places. All the doors were also fitted with sound seals and Raven seals that drop from beneath the door when it closes.
Electrician has also been in at this stage so I now have light! And air conditioning! The studio has top of the line ducted air con in both rooms, which heats and cools as well as brings in fresh air, which is important because this puppy is air tight! It's also the quietest kind of air conditioning you can get.
Also shown is the fabric going up over the insulation.


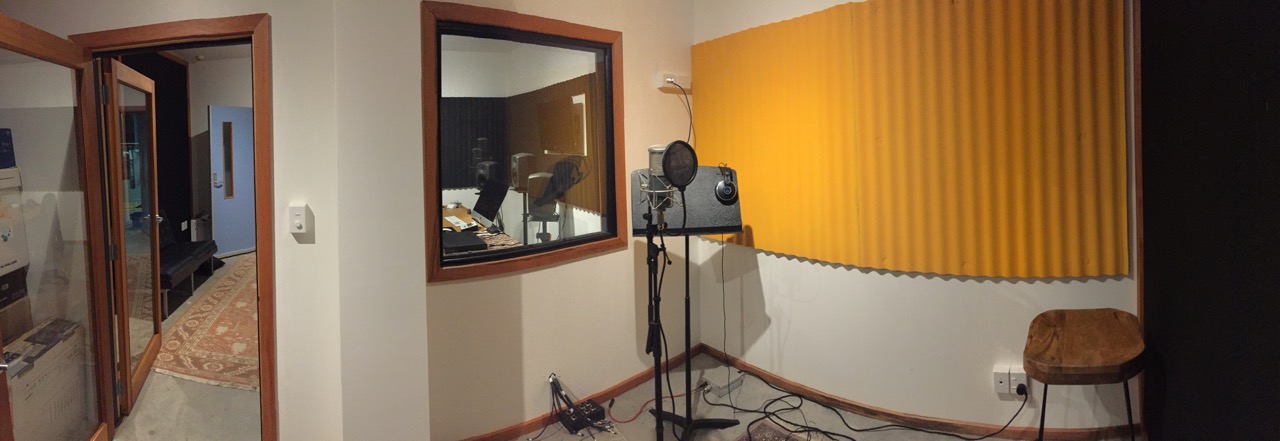
I learned that for 90% of the build process, the place looks like an absolute dump, then in that last 10% it all comes together and start to look like something. All the skirtings and architraves are native Beech. I found a great second hand building/timber supplier who had a secret stash of old native Beech straight from the mill. I had it thicknesed/planed and it came up beautiful with a bit of oil. My slat resonator panels will also be made form this Beech when they go in.


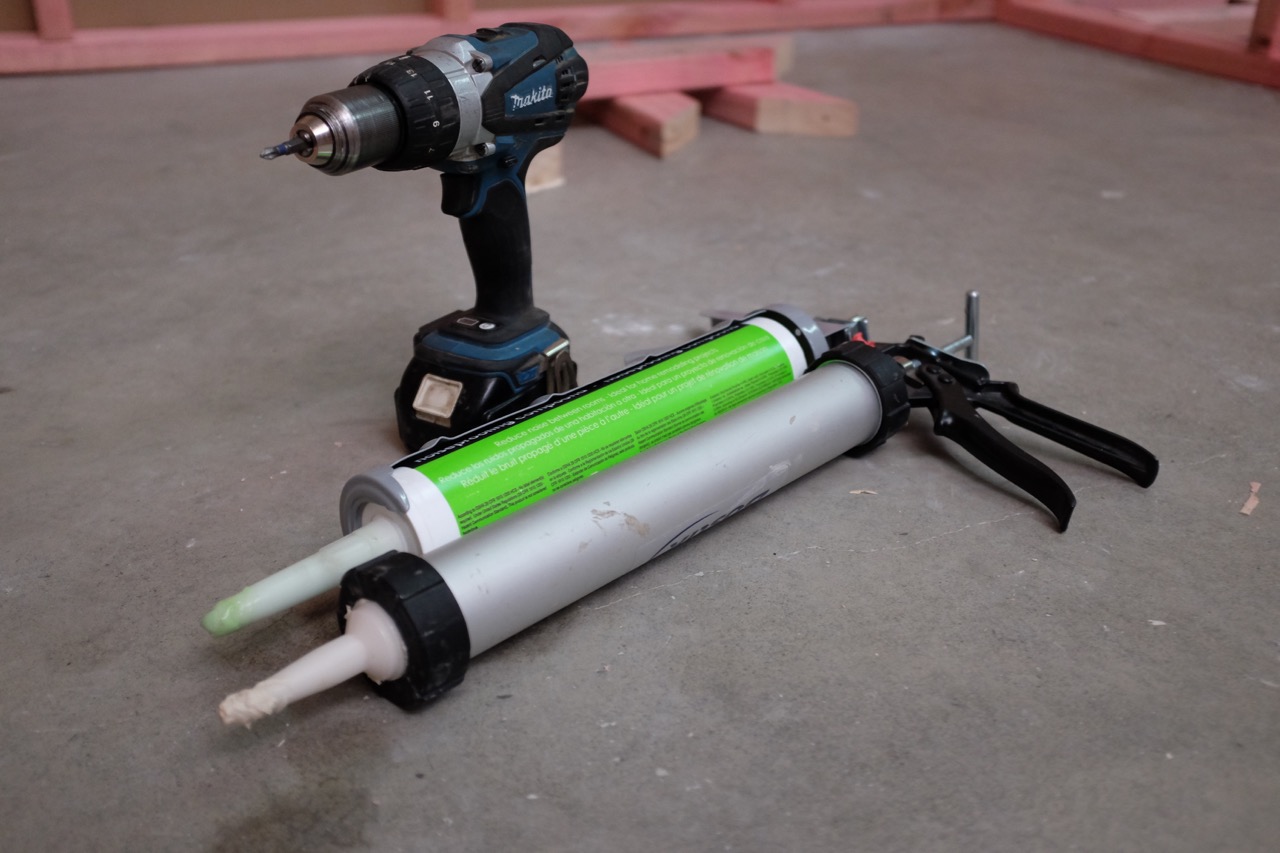
Starting to get some gear in at last...

A few external trimmings...


And here are a couple of shots of the rooms as they are today. The Slat Resonator walls are yet to be finished, as I'm getting the feel of the rooms and what frequencies I need to target with them. So far so good though, I couldn't be happier with how they've turned out.


Sound Design Overview: Audi AP4 Hotlap
For this overview I thought I'd share a perspective that the general public doesn't usually get to hear - just the sound effects, without the music track.
By the way - it's good to listen LOUD! :)
All the sounds except a couple were selected and placed in sync to match the shots. The team at Resonate provided me with a good collection of sounds recorded on location, so after going through, cataloguing, renaming and importing into Sound Miner I could find the sounds I needed reasonably quickly.
I usually break the soundscape down into 3 categories: Atmos, Literal SFX and Abstract SFX.
Atmos tracks are the sounds of the spaces the action is taking place in - cold wind, icy air etc.
Literal SFX are the sounds that relate to what's happening on screen in a literal sense - car sounds, flag whips, crowds, skids etc.
Abstract SFX are additional sound design elements that give weight to edits - booms, hits, slams, whooshes, sub rumbles, drops etc. These don't necessarily sound like anything on screen but they add to the feeling and the impact of the video.
You can see in the Pro Tools session below, Atmos tracks in bright green, Literal SFX in red and Abstract SFX in dark red. I also broke out the car sounds into a separate colour (the darker green above the atmos tracks. Music is blue and the dialogue/gopro tracks are orange.
We all have different ideas about what tracks should be what colour - these are just the ones that make sense to my brain!
Pro Tools Screenshot
A cool aspect of the video that inspired particular sound design freedom was the use of slow motion and speed ramps - especially the shot at 0:38 which really allowed me to go get creative.
Here's the Full Mix version with the music track so you can get an idea of everything working together. That is the goal after all - to make all the elements work as one.
You want to be able to hear each element, but it still has to sound like a cohesive whole. An approach that really helps this is timing the effects to be exactly in sync with the music track.
All in all, another cracker project from Resonate Productions. This video was one of a series of 3 videos, 3 teaser cut down versions and a series promo. You can find them all over on Audi NZ's YouTube Channel.
Thanks Simon, Arthur, Chris and Stefan at Resonate.
http://www.resonate.co.nz/
Studio Upgrade: 5.1 Surround Mixing and Monitoring
One of my plans for the new studio here in Napier was to set up for 5.1 surround mixing and monitoring. This year I've achieved that, and have been putting the system to good use working with Screen Vistas re mixing and ensuring quality control across their national cinema advertising.
I already had two Genelec 8240A monitors so for the upgrade the logical step was to carry on with Genelec for the rest of the system. I now have an 8340 (the same as an 8240A but the newer model) for the Centre channel and 2 8330 monitors for the L and R surrounds. The subwoofer is a 7360A Smart Active Subwoofer.
This isn't exactly my system but gives you the idea of what they look like!
Because of the additional channels needed for 5.1 mixing I also had to upgrade my interface, and chose to go with the Universal Audio Apollo 8. My basic reasoning for this was that I already have the Apollo Twin and love the sound and usability of UA's software and plugins. You can link the two units together via a Thunderbolt cable, which allows you to use the great wee Twin interface as a master monitor controller, and also adds their DSP chips together to give greater processing power for the UAD plugins.
Universal Audio Apollo 8
But wait! There was one more upgrade I needed. Since the start of my business I had always used the standard version of Pro Tools, without the need for the additional multichannel mixing capabilities or other nice features that HD has. But once you get into surround then you have to use Pro Tools HD, so I now run PT HD 12, which has been great - some super useful features like VCA's and Clip Effects just make mixing so much easier and faster!
I'm very happy with how the system sounds and performs - the only downside is that I won't be getting Xmas or Birthday presents for the next few years! Ouch! :)